Beer Making Part 3
Step 9: Get the bottles
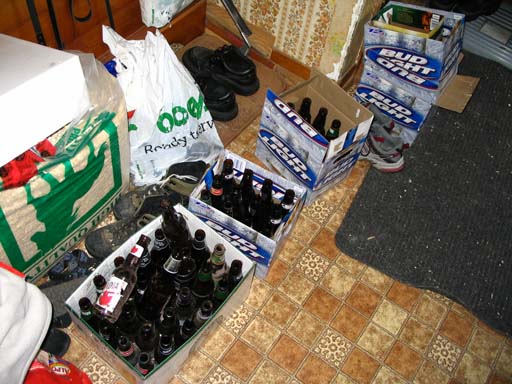
Now we need to get beer bottles. I quickly found out that there are only two ways to acquire bottles. Drink the beer yourself or ask people you know to save you some if they don't mind. I was lucky enough to find three people that would give me beer bottles. I would like to thank Jackie and Timmy and Debbie for giving me their bottles. They gave me more than enough to get the job done. It saved me from having to drink 61 beer over a 72 hour time period by myself.
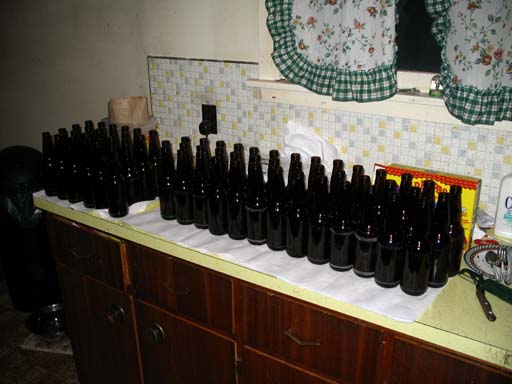
Ok, here are about a third of the bottles. These are the ones from Jackie and Timmy. They gave me what I guess to be about 100 bottles, and Debbie got me 36. Of these I only need 61, and therefore only cleaned 61 bottles.
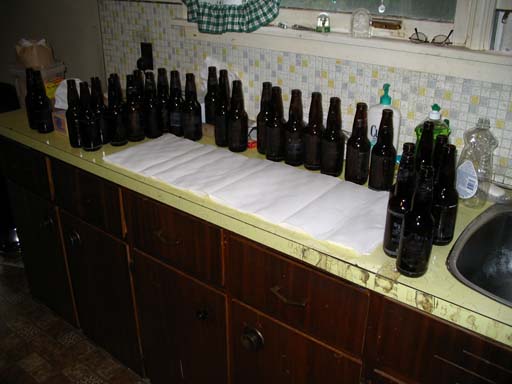
Now here are some of the bottles after I washed them out, 41 bottles to be exact. When you wash out the bottles you MUST use brewers detergent, not dishwashing liquid. Dishwashing liquid leaves a film on the bottle and will ruin the beer. I used dishwashing liquid and had to rewash these bottles with brewers detergent.
After I improperly washed the first 41 bottles I noticed that the labels were still on the bottles, so I decided to steam them off. This takes too long and is too boring/annoying/hot.

Step 10:Cleaning the bottles the right way
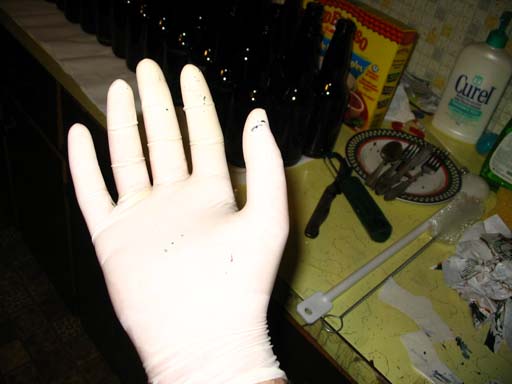
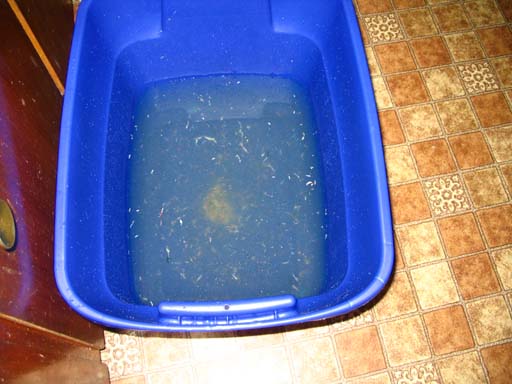
To clean the bottles the right way we fill a tub with water and brewers detergent. Soak the bottles for 20 minutes and rinse them off. You may want to use rubber gloves as depicted below.
As I mentioned above, I incorrectly cleaned the first 41 bottles. I had to steam the labels off the first 41 bottles because the labels wouldn't peel off after I washed them. So... to get the labels off the last 20 bottles I decided to just soak them in the water/brewers detergent for the 20 minutes and then peel the label off. Well after soaking the 20 bottles for twenty minutes in the solution the labels came off on their own... so did the glue and most of the paint from the labels. The firts picture below shows the labels I found floating around in the tub. The neck labels on the left are from Keith's bottles and are not only stripped of paint completely, but are also opague! The second picture shows all the paint left floating in tub after I soaked the 20 bottles with labels.
In case I confused anybody, I had to soak all 61 bottles I needed, the 41 I incorrectly cleaned the first time as well as the other 20 bottles I needed.

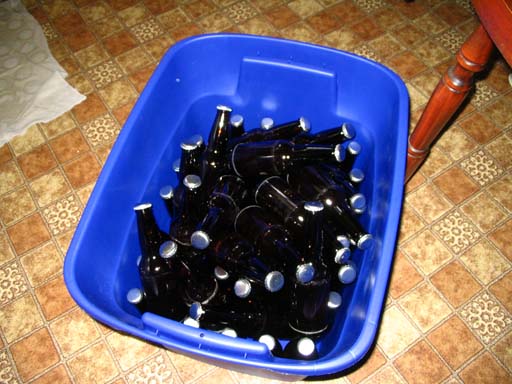
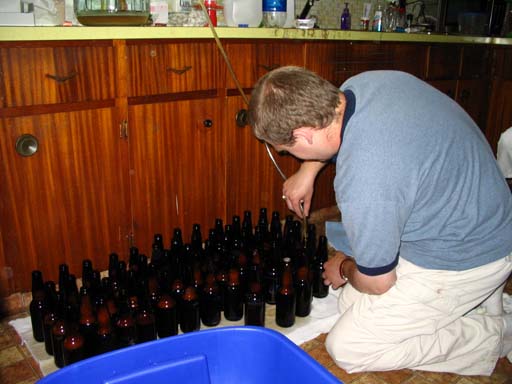
The picture below shows all the bottles that are sanitized, unlabeled, and ready to go.
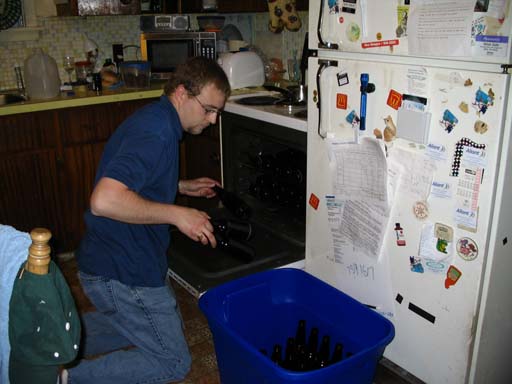
Step 11:Sterilizing the bottles
To make sure the bottles were sanitized correctly I decided to bake the bottles. Now this will sterilize the bottles, not just sanitize them. I could have done this instead of all that cleaning, but hindsight is 20/20. This is my first time using glass bottles, so I am kind of mucking my way through it as I go. Baking the bottle is a one step answer. The problem that you must worry about is thermal shock. I like that phrase... thermal shock... anyhow, If you heat up or cool down the oven too quickly the bottles may break/shatter. To avoid breaking bottles you should SLOWLY heat and cool the oven. For a list of temps and times just surf the net. The pic below shows me loading the oven up.
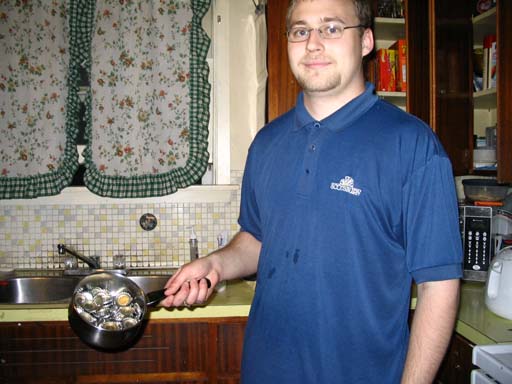
Step 12:Boiling the caps
We're almost done. The bottles are as clean as can be, now we must make the caps just as clean. Simply take the caps and boil them in a pot with water for a few mins.
Step 13:Getting ready to bottle
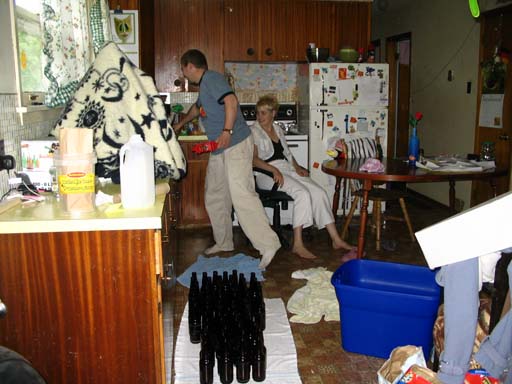
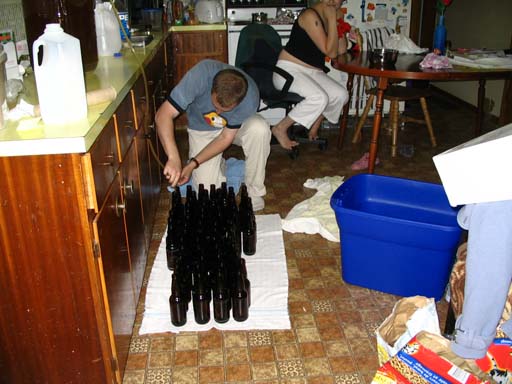
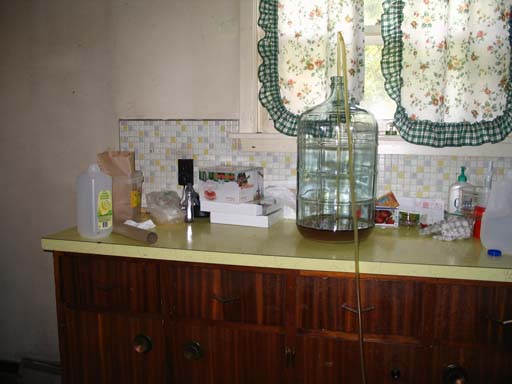
We are now ready to start bottling our brew. Make sure that your carboy is in a high place... where it should already be. Set the bottles well below the carboy, so that the syphon hose will work correctly. Put towels on the floor to catch the beer that you miss with... once the flow of beer starts it doesn't stop until the carboy is drained, so make sure that the bottles are close together. The set-up should look something to the picture below. You can't see the carboy because I have it wrapped up in blankets and towels to prevent sun from hurting the yeast.
Step 14:Getting the beer in the bottles
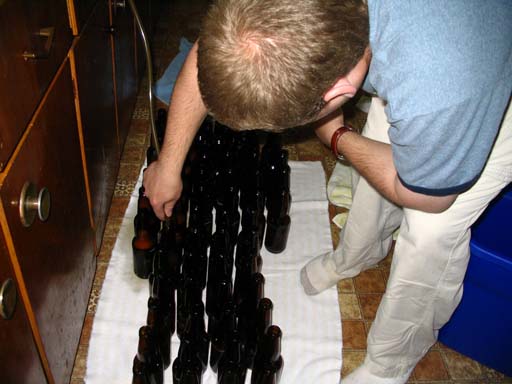
Stick one end of the syphon hose in the carboy, get close to the bottles and start the beer through the syphon hose. For those who don't know how to syphon, just suck on the end not in the beer and always keep the end you sucked on below the carboy, or the flow will stop. As the beer pours out just make sure you have a bottle beneath it. Fill the bottles up to the neck only. This is because foam will build as you pour the beer in. If you fill past the neckline, the foam will overflow out of the bottle, thereby wasting potential beer. You can fill the beer up as high as you want after you finish bottling them and the foam level drops. Fill all the bottles unilt the carboy is empty.
Below are the 61 FULL bottles of beer
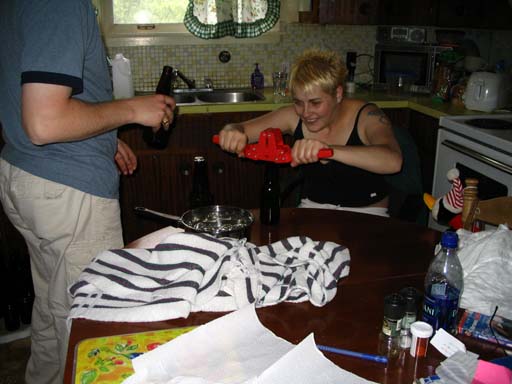
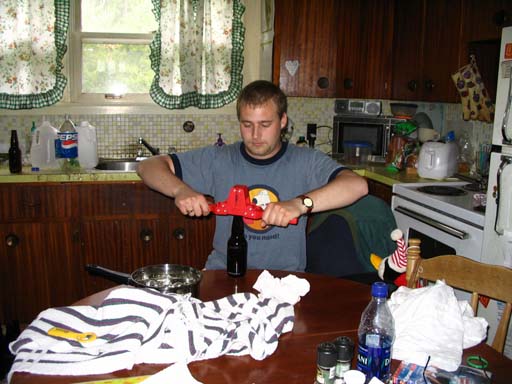
Step 15:Capping the beer
This is pretty simple... put the cap on the bottle and then pull down on the levers. My sister demonstrates below in the first picture. Capping is the best part of beer making, as you can tell by the look on her face. The second pic is of me capping the beer, I took over for my sister after 3 beers.
And there you have it! Our beer is done, let it sit for a week or so and then you can drink it... but the flavor fully matures after 2-3 months. Below is the pic of my 61 beers. If you have any questions, concerns, or want a hand making some, just contact me using my e-mail on my main page.